Foolish assumptions to follow along with this guide.
- An EC2 instance with Linux Running.
- Have your AWS access and secret keys.
- Have a text editor like VS Code unless you’re a Vim Warrior.
If you’re not sure how to get the access and secret key follow the link below for official AWS documentation.
[Understanding and getting your credentials
You use different types of security credentials depending on how you interact with AWS. For example, you use a user…docs.aws.amazon.com](https://docs.aws.amazon.com/general/latest/gr/aws-sec-cred-types.html "docs.aws.amazon.com/general/latest/gr/aws-s..")
Installing Terraform.
Go to https://www.terraform.io/downloads.html
Choose your operating system, in this case, I’m on an EC2 instance ubuntu 18.04. Copy the link address, I advise you have a notepad or just any editor to ensure you got the link.
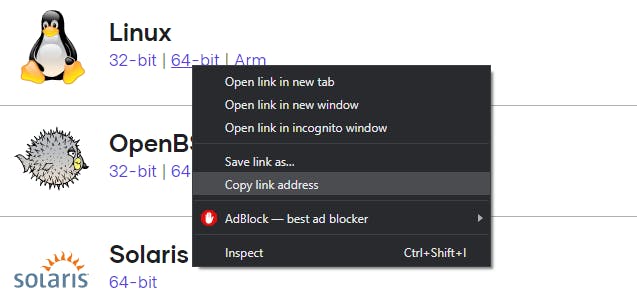
Next, go paste the link on your terminal.
wget https://releases.hashicorp.com/terraform/0.12.26/terraform_0.12.26_linux_amd64.zip

Installation
Note this is a zip version of terraform as you can see by running the ls command so you have to unzip it by running unzip.
Side note: The ubuntu 18.04 default image on AWS does not have the zip/unzip binaries by default, you might have to install it first simply by
sudo apt-get install zip unzip
Next, we make a directory, in this case, I named mine iac (you can name it anything as long as you will remember the name) and moved terraform to the directory. Now if your try running terraform on the terminal it’ll not be recognized, to fix this we have to update the path in order to be able to run terraform commands from anyway on the machine.
To do this we edit the bash profile and edit the .profile file, in this case, I will use vim, you can, however, use any editor of choice.
$ ls
$ unzip terraform_0.12.26_linux_amd64.zip
$ vim ~/.profile
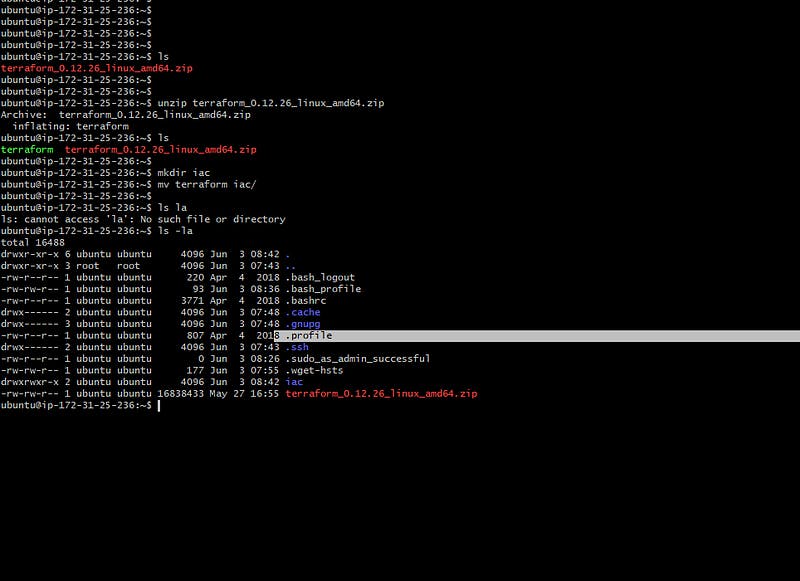
Unzipping and selecting the bash profile
Once you are inside vim click i insert/edit mode then scroll to the bottom of the file and the following line:
// REMEMBER THE NAME OF THE DIRECTORY YOU CREATED EARLIER!!! Mine was "iac" //
export PATH=”$PATH:~/iac"
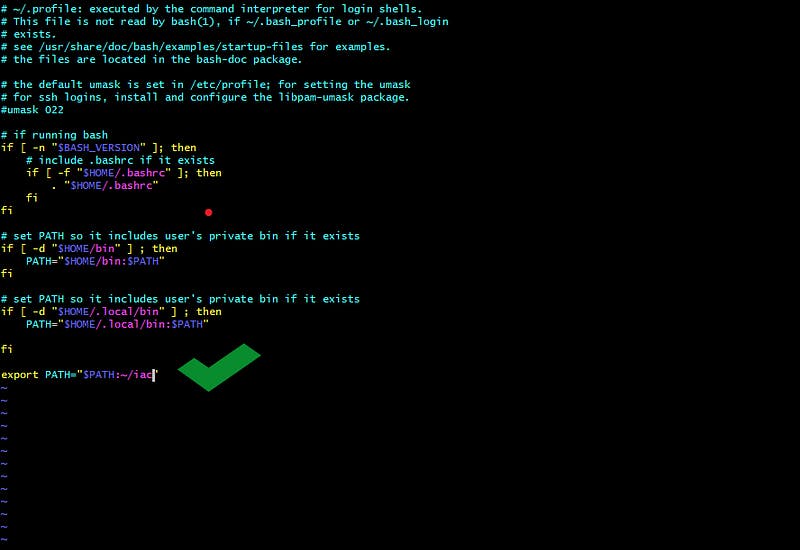
Inside Vim, Adding PATH
Click Esc to exit insert mode and:wq to write and quit.
Additionally, you have to run $ source ~/.profile to update the path as it does not do so by default. Now you can run terraform on the terminal.
$ source ~/profile
$ terraform --version
$ terraform
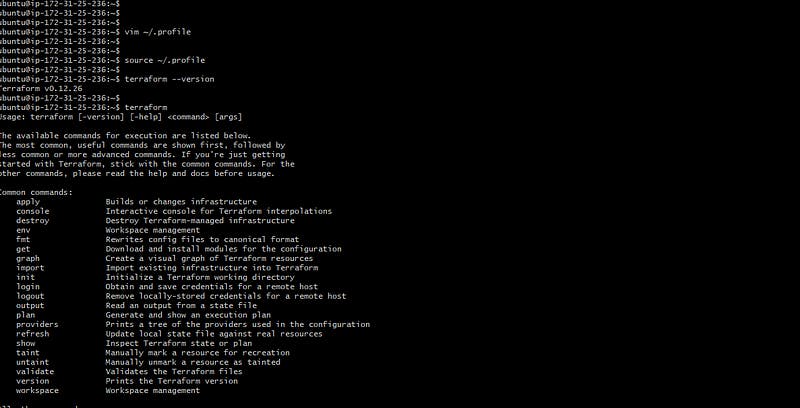
Checking terraform version and if installed
Yay! We’re done with the installation now let’s build something!!
CREATING AN EC2 INSTANCE.
- Create a directory and a cd to it, make a .tf file in the directory
- Copy and paste/ type the following code to the .tf file
Important to note: “ami” of an instance is region-specific, in my case, I used the Cape Town Region ensure your configuration complies with this.
provider "aws" {
access_key = "YOUR_ACCESS_KEY"
secret_key = "YOUR_SECRET_KEY"
region = "af-south-1"
}
resource "aws_instance" "ec2" {
ami = "ami-03611e0f71e9d9f66"
instance_type ="t2.micro"
}
You can cat the file to ensure configuration is accurate and saved properly, then run terraform init to initialize terraform.
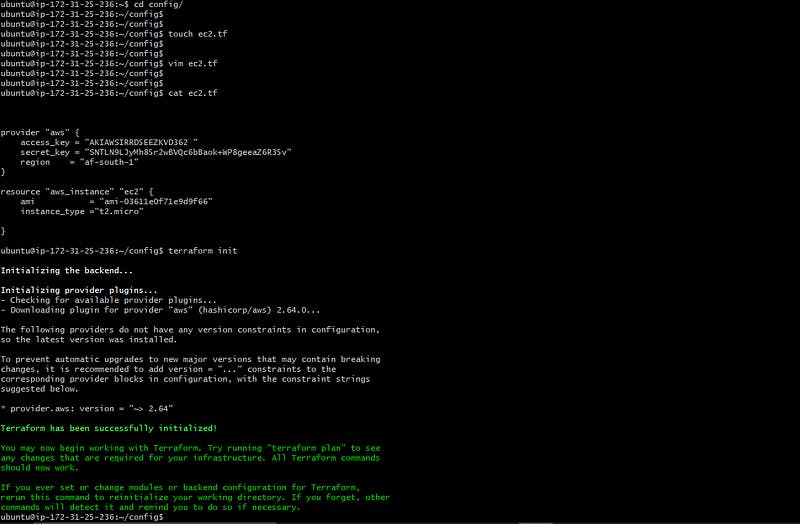
Creating a .tf file and initializing terraform
Next steps are:
$ terraform plan // Preview task to be performed by terraform
$ terraform apply // Apply and perform configuration
//Terraform will prompt you if you want to perform this config, and ask you to enter a value. You should enter yes to complete the configuration
After go to your AWS EC2 dashboard to verify instance has been created.

Confirmation that Instance was created
Don’t worry about me showing the public IP for the instance by the time you read this, it would have long gone.
Well, my favourite command of all …….. drumrollllll .
$ terraform destroy
To delete whatever resource(s) you provisioned with terraform simple run that command and it’ll annihilate everything.
